Saturday, November 30, 2013

Decorating is a sloooow process

     Decorating is something that is cultivated over time.  Sometimes a loooooong time.  It's also something that tends to change over time as our personal tastes evolve.  I can remember when my husband and I rented our townhouse over 16 years ago.  It was small, and I was into collecting bunnies.  I loved the blue and mauve color scheme from that time period, and everything had a "country primitive" vibe to it.  

     Then we bought our first house.  It was a 1920 Dutch Colonial, with a lot of charm and character but with much needed updates already in place.  My style of decor changed, and my first floor was very formal in appearance.  The second floor where the bedrooms and full bath were located was very "shabby chic". 

    That's also when I discovered my love of old furniture versus the newer stuff. There's just something about sitting at a table or on a chair that was loved and cherished previously.  I also love the endurance of time, I need kid tested furniture.  My second house is a 1929 cottage style bungalow.  When it was first built, it was set up as 2 apartments, somewhere along the way it was converted to a single family.  This house was far from my already previously done home.  In fact 7 years later, we are still remodeling, repairing, undoing and re-doing what was done before.  It fit the definition of fixer-upper, but a lot of progress has been made in that time.  

     Now, I am going from room to room and redecorating.  My focus is on one room at a time.  Taking time to look at what the needs of my family and myself are.  Paying attention to every detail, and I find myself falling in love with my home all over again. I've found Pinterest to be an invaluable tool, as well as magazines and blogs.  There are just so many creative and unique ideas out there.  

     My process is simple.  I pin everything that strikes a cord with me.  I try and keep my boards organized and in groupings.  For example, different picture arrangements, color schemes, styles of furniture, etc.  I also pin lots of finished rooms.  You never know what that "thing" will be to inspire you.  

     I showed you in one of my earlier post the inspiration behind my girl's room.   It took months for me to put the room together on Pinterest and I know it will take a long time for it to be finished, but progress is being made.  I am beginning to see all of my pins come to life, and I am so excited for the finished product.  

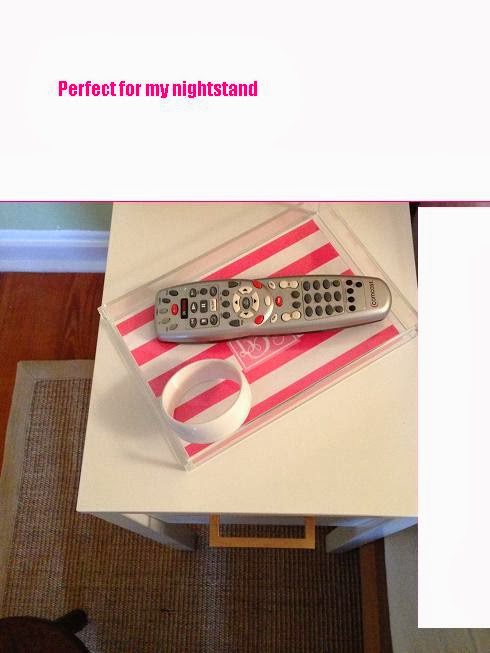
     In the meantime, I hit a thrift store I had never been to before.  It was just okay, but I did manage to find some goodies.  Here they are, as well as my future plans for them.


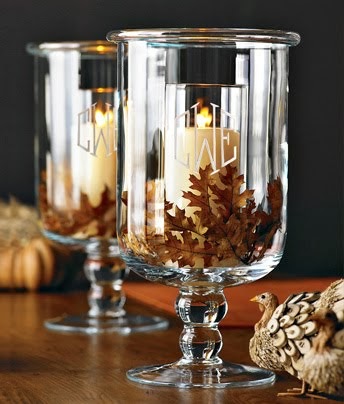
I have a great not to far off in the future project for the glass hurricane, which was a real bargain at $2.50. It's kind of a toss up between this project, which you can find out more here.


And another great glass etching project here.


 I also purchased a glass frog for flower arranging and the bag of pine cone ornaments.  I will be cutting off the gold ornament part.


     I'm not sure if I will be keeping the milk glass glasses.  Sounds kind of like a tongue tie.  I found this set of 8 in perfect condition, and found the same exact set minus 1 glass on Etsy selling for $33. My set cost a whopping $8.  That's right a buck a cup.  

Are you rolling your eyes yet at the milk glass?  I have a plan for these.  I glimpsed just a peek at this milk glass vase containing an herb.


You can follow the link here.

Okay time for me to stop blogging and get to actually doing some of these projects!  Leave a comment below and let me know what you love to pin most on Pinterest?

Friday, November 29, 2013

Grain Sack fabric deal...

     I just had to pass this along to all of you.  I love grain sack fabric but it can be pricey and hard to find enough material to work with.  Well I just checked my Pinterest, and found this amazing fabric pinned in all of these fabulous stripes.  All  of the color choices are 54" wide and come as 3 yards. You can buy additional, but I would grab them fast, before they are all gone.  Click here for the link to Decor Steals.  Guess which one I just bought?  I guess I better finish up my other chair before I start on the next one.  What deals have you managed to score today?  Leave me a comment below and let me know.

Happy Black Friday Shopping!  


Turkey the day after...

Here are a couple of recipes starring....you guessed it the leftovers from Thanksgiving.


     I have lots of turkey and all the fixings left over, so much so I started looking for recipes to change things up.  I don't mind leftovers but at some point, you do get to that "ugh turkey again"? Well here are a few recipes to get you and I out of that turkey rut that is soon to follow.  Enjoy!


You can find the recipe here.


 Click here for all these tasty recipes using Thanksgiving leftovers.  So many to choose from, you won't be disappointed.


 Click here to find out how to make these yummy  mashed potato puffs.  I think these will be on my dinner table tonight.


 Click here on how to make this Thanksgiving Leftover Pizza.  I have so many recipes to choose from.  This will be a tough one for sure!


Gobble, gobble y'all!

Thursday, November 28, 2013

Happy Thanksgiving Everyone!

     My belly is beginning to rumble with all the wonderful aromas coming from the kitchen that my wonderful husband is preparing.  All on his own, I might add.  Yep, that's right, he cooks!  I think he might expect me to clean the kitchen after he's done.  He can expect all he wants...but as my son keeps saying "he's wrong".  My family knows me all too well.  After a large Thanksgiving meal like that,  my only plans will be to undo the top button of my pants and waddle my way over  to the couch for a little afternoon snooze.  Well, that's my plan but highly unlikely with 3 kids.  A girl can dream about how she wants to spend her food coma.  

     I hope you all are having a very wonderful Thanksgiving dinner with your family and friends, and may we all be as blessed as we are right now in this moment.  I'm enjoying the delicious smells coming from the kitchen, and watching my children, down on the floor setting up train tracks. I love just listening to them both argue and giggle.  I wouldn't trade this for anything, not even a food induced coma.   

     Here are a few funny youtube videos I found earlier.  I hope you get a little enjoyment from them.  


Happy Thanksgiving!

Wednesday, November 27, 2013

Where inspiration to design a room begins.

     Are you spending the day running around for all those last minute items? Or have you crossed everything off your list?  This is certainly the busiest time of the year, but make sure to carve out just a few minutes each day to take a deep breath.  Look around and notice what you have accomplished and not what still needs to be done.  You will get there!  Thanksgiving isn't about the meal, (although I do love me some stuffing), it's about the people that we surround ourselves with.

     This long weekend, I will be avoiding the crowds at the mall and working on getting closer to getting my girl's room put together.  I've come a long way from where it was.  I wish I had a before shot, but sadly I don't.  The majority of the painting is finished.  I've painted the walls a turquoise like blue.  (Exact name of color will be on another post).  The ceiling  is in a flat white, and the trim is the same throughout my entire house which is a semi gloss white.  I still have the doors and the interior of the closet to do.  Hopefully this weekend I can get those done.

     Here are my inspiration pictures via Pinterest.


I love how sweet and sophisticated this room is. I've had to modify things to fit the space and shape of the room.  As much as I love the bookcases flanking each side of the bed, there just isn't enough room along the wall I will be placing 2 twin size beds against.  I'm still purchasing fabric for pillows and the headboard, but I've already bought the duvet cover for both beds. 


Pottery barn kids has this set on sale.  I purchased just the duvet cover and I'm leaning towards white for pillowcases and sheets.  I'll have plenty of pillows and an upholstered head board to bring in additional colors and pattern. One of the reasons why I chose the striped duvet, is because the plan was to paint stripes on their ceiling like the picture below.  Unfortunately, it's just not possible.  The room is an awkward L-shape, and the ceilings and walls are less than flat and straight.  It was just impossible to use the laser beam level in order to tape the stripes.  I'm still looking for more inspiration for their ceiling.  It's the fifth wall that is often neglected.
Oh well, back to the drawing board with this one.


 Click here for more information.

Both the door to their room as well as the closet door will be painted pink.  In a later post I will have all the names of the colors, I am using.  I am not using a chalk board paint as we have enough chalk boards around the house.  

I'm thinking I might make the closet kind of fun and paint stripes in there.  At the moment they have a bi-fold door, which rarely closes right, so I found a great tutorial on how to make your bi-fold door into a french door.  More to come on that if I'm successful.

Here's my moment to take a deep breath and think about all the things I have already crossed off my list, and NOT reflect on what still needs to be done.

Besides eating leftovers this weekend, what are you up to?


Tuesday, November 26, 2013

DIY Holiday Decor Inspiration..

    Here come the holidays, ready or not.....


      I've spent the morning with my 2 yr. old cuddling under the blanket and watching "Barney's Christmas" movie. It's cold today and yes I know it is November after all, but I am being a cold weather wimp.  It's the kind of day where you curl up on the sofa, coffee in hand, and look for inspiration on Pinterest.  You know what I mean? Oh and play a game of peek-a-boo.


     For years I use to buy holiday decorations right after Christmas.  My house looked and felt like a department store. Every square inch of my home had something to remind you of what time of year it was, just in case you forgot.  What I cherished most then, and still do, are the hand-made ornaments my children have made throughout the years.  They are always prominently displayed on our Christmas tree.  Each of them delights in placing their own ornament and sometimes will secretly move the other's ornament out of the way to spot light their own.  Kids, what are you going to do? 

     I've started to move away from the commercial aspects of the Holidays, and really reflect on what I want to give my children as warm, happy memories.  I find myself gravitating towards a more hand-made, relaxing and use of natural elements in my  home decor to bring out the true meaning of Christmas.  An oasis of calm and peacefulness inside, where we can shut out briefly the hustle and bustle of everyday life. 

     This year I'm going to focus more on affordable, simple, DIY, holiday decorating that I can make. I've turned to Pinterest to find many inspiring projects, and I hope you as well find something to be inspired by.


Click here for the full tutorial.


Click here for the full tutorial.


 What a cute and simple ornament to have my children make.  They can even personalize it.  Click here for the full tutorial.


Here's the how-to on this one.
1.You should be able to find these large styrofoam balls at any craft store.
2.  I suggest spray painting these first in your desired color.
3.  Use a spray adhesive,  (Something you can find at your local craft store).
4. Sprinkle some glitter and then spray a sealant to keep the glitter on your DIY ornament.


 Click here for more information.


 Click here for the full tutorial.

I think I'm going to have a fun and festive weekend of DIY projects.  Share with me any creative ideas you might have for the upcoming holiday season.


Monday, November 25, 2013

When downright ugly becomes inspirational...

     Not to long ago as you might recall, I went to the thrift and loaded up on some, not so pretty, okay downright ugly items. If you haven't read it then you can find it here. I don't always have a plan for an item but I know inspiration will strike sooner rather than later.  This is the eye sore I am talking about.


I initially thought this was someone's craft project gone wrong, but it was constructed well and it was cheap, so in my cart it went.  It wasn't until I went to give it a makeover that I realized this tray in this design retailed for $29.  I'm thinking this should be my new business venture (just kidding).

My daughter's will be sharing a room, as soon as I finish it.  When that is, I HAVE NO IDEA.  It's a process and I try to remind myself of that, over and over.  Things are mostly coming along with a few minor set backs but that's a part of design and making a home your own.  I wanted to bring some sort of inspiration into my girl's room, something they could take to heart and believe in.

Pinterest as well as Google are great places to find inspirational quotes for your daughter. Here's the one I found.


It's important to me that my children grow up knowing that not only do their parents believe in them but they too should believe.


I gave it 3 coats of Krylon's Blue Ocean Breeze in gloss. I had the quote made by Craft Cuts in vinyl, you can find a link to them here.  The quote cost me a little less than $20.  


I just placed it on the tray, where I wanted it to go and then peeled the backing off.  It took a few minutes to rub it completely on. A quick tip is to peel slowly as to not rip the vinyl.  Sometimes you have to go over a particular spot that hasn't yet adhered.

Here's what it looks like now that it's completed.

And a before and after shot.


 What are some quotes that have inspired you?  Where do you go when you are looking for a little inspiration...Just leave a comment below!


Sunday, November 24, 2013

What's cooking, good looking?

     Ugh....I know I'm behind on blogging...*hangs head in shame*.  I did manage to make a delicious meal Friday night, took lots of pictures, but had ZERO ambition to blog about it.  On Saturday, I finished up some smaller projects, came to a realization that a larger project wasn't going to be actualized, and then took the rest of the day off to hang with the kiddos.  

     Alright back to Friday night's dinner.  Don't judge me by my poor photography skills.  I'm still getting the hang of all of this.  Oh and don't judge me by the name of this recipe, I didn't name it, but trust me if you like buffalo chicken, you will enjoy this dish.  I found this recipe via Pinterest and you can find it here.

     I always make double, because I'm learning that 10 year old boys can really EAT,  and I do like to have some for leftovers for the middle of the week.  So if you are like me you will want to double the ingredients.  

Buffalo Chicken Garbage Bread

     Here's a list of the ingredients you will need:

2 boneless chicken breasts
1 tsp. olive oil
1 pizza dough (I bought Pillsbury canned pizza dough in the dairy section)
8 oz. of shredded mozzarella cheese 
3 oz. of shredded cheddar cheese
1/2 cup of Franks Wing Sauce (I used the store brand)
1/3 cup of ranch or blue cheese dressing (I already had ranch, so that's what I went with)


For the exact directions and measurements, click on the link above.


I rolled the pizza dough out and then spread a combination of the ranch dressing and a little bit of hot sauce.


I cut up into chunks the chicken breasts, cooked them until they were no longer pink and then added hot sauce to the frying pan.


 I gave the chicken a few minutes to cool before spreading it out on top of the pizza dough.  Once, I did that I placed both the mozzarella as well as the cheddar on top.


I know it's not looking too pretty here, but trust me it's delicious.  All you do is just roll it up as best you can.  


 Place it in the oven for the amount of time the pizza dough package recommends and....


I made 2 of these to feed 5 of us, and I can tell you we have very little left over.  It's not as spicy as you would think, so you might want to crank up the amount of hot sauce if you are looking for nuclear buffalo chicken.

What's cooking in your kitchen tonight?  Leave a comment below!!


Friday, November 22, 2013

A little bit of gold is all I need....

Here's to a little "Midas" touch

     The next tray project I am about to show you took me all of 30 minutes to put together, and less than $20 bucks.  If you don't already own some of the items I used below expect to pay around $25.  I really think I got a lot of glam factor from this project.  As I have admitted in my last post, I LOVE TRAYS...and once I figure out how to install my little Pinterest button on my blog, you will see an entire board dedicated to just them.  

     Okay, onto the details. I purchased an unfinished wood tray from Michael's craft store for $5.99.  Actually I purchased two, but that's going to have to wait for another post.  I spray painted it white, but really you can do any color that fits your home decor. It's what I had on hand, and since it will be going in my bedroom, the white really worked best.  It takes about 10 minutes in between each coat to dry, and I gave it 2 coats.  This is definitely something you want to do outside or in a very well ventilated room. 


     Next, I decided I wanted some sort of design in the middle of the tray but I have ZERO artistic abilities, unless stick figures are considered "artistic"?  Enter one of my favorite companies (I am not sponsored by any companies, these are my opinions and preferences), called Craft Cuts.  You can find the link here.  They offer a wide range of both vinyl and wood lettering, not to mention various shapes.  I decided on a yellow oval in the middle and then a wall art/decorative end #223 in white to go on top of that.  I measured out the dimensions of the inside of the tray and then kind of guessed as to what size I wanted the vinyl cut-outs to be.  It took about a week to arrive and was around $10 dollars.  


All you need to do is peel off the backing and place it on the desired location.  The majority of the time, I just use my finger to rub it on, but at times I have used a credit card.


As you can see here, I simple placed the second design on top and gently rubbed it on and then peeled the paper away.  I did decide my tray needed a little more glamour, so I grabbed my Krylon gold leaf marker and colored the insides of the handles and the top. I  purchased this marker at Michael's a while back.  Again not terribly expensive at around $5. 


I use this tray to showcase some of my milk glass pieces that I have found of course at the thrift store. 


If I am feeling a little ambitious later on. then you should check my next post later today titled "What's for dinner"?  I have a really hot dinner recipe to share with you all.


Thursday, November 21, 2013

Trays, trays everywhere....


Adding a nice touch with trays....

   
    O.K. so yesterday I admitted to being a "chairaholic", well that isn't the only thing I find myself hoarding, err collecting.  I also love trays.  I have a Pinterest board dedicated to just that, TRAYS. I love organization even though my house at the moment doesn't look it, and trays offer a great way of displaying my found treasures or organizing them in one place.  My next couple of blogs will probably be on this same topic as I still haven't gone out and gotten more staples to finish my first ever upholstery project.  Let me show you project # 1 as I'm calling it.  It doesn't even involve spray paint, which come to think of it is probably something else I hoard.

When I saw this I said "oh yes, please".


I actually wanted something slightly larger for my night stand.  A place to put the remote (and yes in this family I get the remote), and somewhere to put any jewelry I might have forgotten to take off.  As luck would have it, that same day I discovered this great how-to blog on how to make a tray just like this one, but the monogram, was FREE.

Now, I have my own to ooh la la over.  Here's how I did it. I found this fabulous site which offers lots of different styles. You can find it here: http://printablemonogram.com/product-category/acrylic-tray-insert/

The first thing I did was to laminate it.  I don't have a fancy machine just individual sheets I picked up at Target.  The exact tray I used can be found here at the Container Store. http://www.containerstore.com/shop/jewelryStorage/traysOrganizers?utm_medium=Affiliate&productId=10028194&utm_source=Linkshare&utm_campaign=Linkshare_Affiliate&sku=10050369

I know I spent a whole $5.99 plus shipping for this!


Here's my handy, dandy tools.


I placed the tray on top of my laminated paper and made small snips as to where it needed to be cut.  Once that was done all I needed to do was place the sheet inside and voila....


See I told you I get the remote!  Tell me about some of your favorite Pinterest projects below.