Wednesday, November 20, 2013

She's getting all BLINGED out...

Reupholstering for the first time.

     I think I've mentioned before that I am a seat of my pants kind of decorator inside my home. Sometimes I manage to come up with some pretty amazing ideas, executed well, and other times, well I hide the evidence.  I've read a few blogs from some very talented DIY ladies out there, on the topic of reupholstering.  They make it seem fun and fairly easy to do.  I want to join in on the fun and easy to do. 

     Okay, I'm about to admit something to you all, that I have NEVER said out loud.  I am a "chairaholic".  Yup, I see a chair and I can't say no, although I've gotten a lot better.  In fact so good, I have managed throughout the years to clear out most of my chairs. I said most, but NOT all.  Back when I worked full time and had a disposable income (has it been 10 years already?), I paid a whole lotta money for a pair of chairs that I had shipped from France.  I was instantly in love with having authentic French furniture.  The lines of the chairs are AMAZING, the orange and black tint to the wood, not so much, and the fabric...um don't even get me started on how ugly it is.  But love is blind in many cases, and this has certainly been no exception.  Let me introduce to you one of the pair.  (The other one is camera shy, or is it she's hiding in the basement under a ton of stuff?)  Now is the time to put on your rose colored glasses if you have any. 


I wasn't lying when I said she was a little on the "orange" side and her frock, well again, don't even get me started.  But I have a vision, or I've never taken off my own rose colored glasses.  I needed to seriously do something to tone her down and make her more in line with my style and taste.  (I'm still figuring out my style and taste).  I grabbed a while back this thing called "Rub n' Buff", it was at Michael's and I was armed with a 40% off coupon.  This tiny tube actually covers up to 20 square feet....impressive to say the least.  You only have to use a minimal amount and by that I mean pea size for each section of the chair.  

Here's what I used...a pair of disposable gloves, a somewhat stiff paint brush, and the Rub n' Buff.  It's best to do this outside, although it doesn't have that, obnoxious of an odor.  I simply squeezed a tiny amount on the tip of the brush and lightly painted it on, I then went over it with my finger.  That really helps to smooth it out and distribute it a great deal more than the brush does. The brush was great for the smaller crevices and trust me there were plenty.  


Here she is looking a little "fancy".  Look at those legs...now can you see what I first fell for?  I left the chair outside all afternoon.  I have decided to do a section at a time, just in case at some point I feel that I am not able to reupholster the chair.  The back of the chair being my starting point, since I have never done this before.  It took a couple of hours of just pulling each individual upholstery tack out, using needle nose pliers.  Ouch, is all I can say every time I pinched myself.  

Being cheap and not wanting to invest in expensive fabric, I purchased a painter's drop cloth from Lowe's.  It cost a whopping $20 bucks and should be enough to do the whole chair. I actually went with it because I love the look of the canvas.  I did bleach it and washed it a few times to "soften" it up.  

Once I had the back fabric off, I placed it on top of the drop cloth and gave myself an inch all around.

As you can see, I never work alone.  Now onto the moment of truth.  I already owned a staple gun.  I just simply tucked the fabric slightly under and stapled.  A few times I had to remove the staples because they weren't sitting flush, but all in all, it's pretty easy and (fun).  I made sure to tighten and tug the fabric and almost managed to finish it all, when this happened.
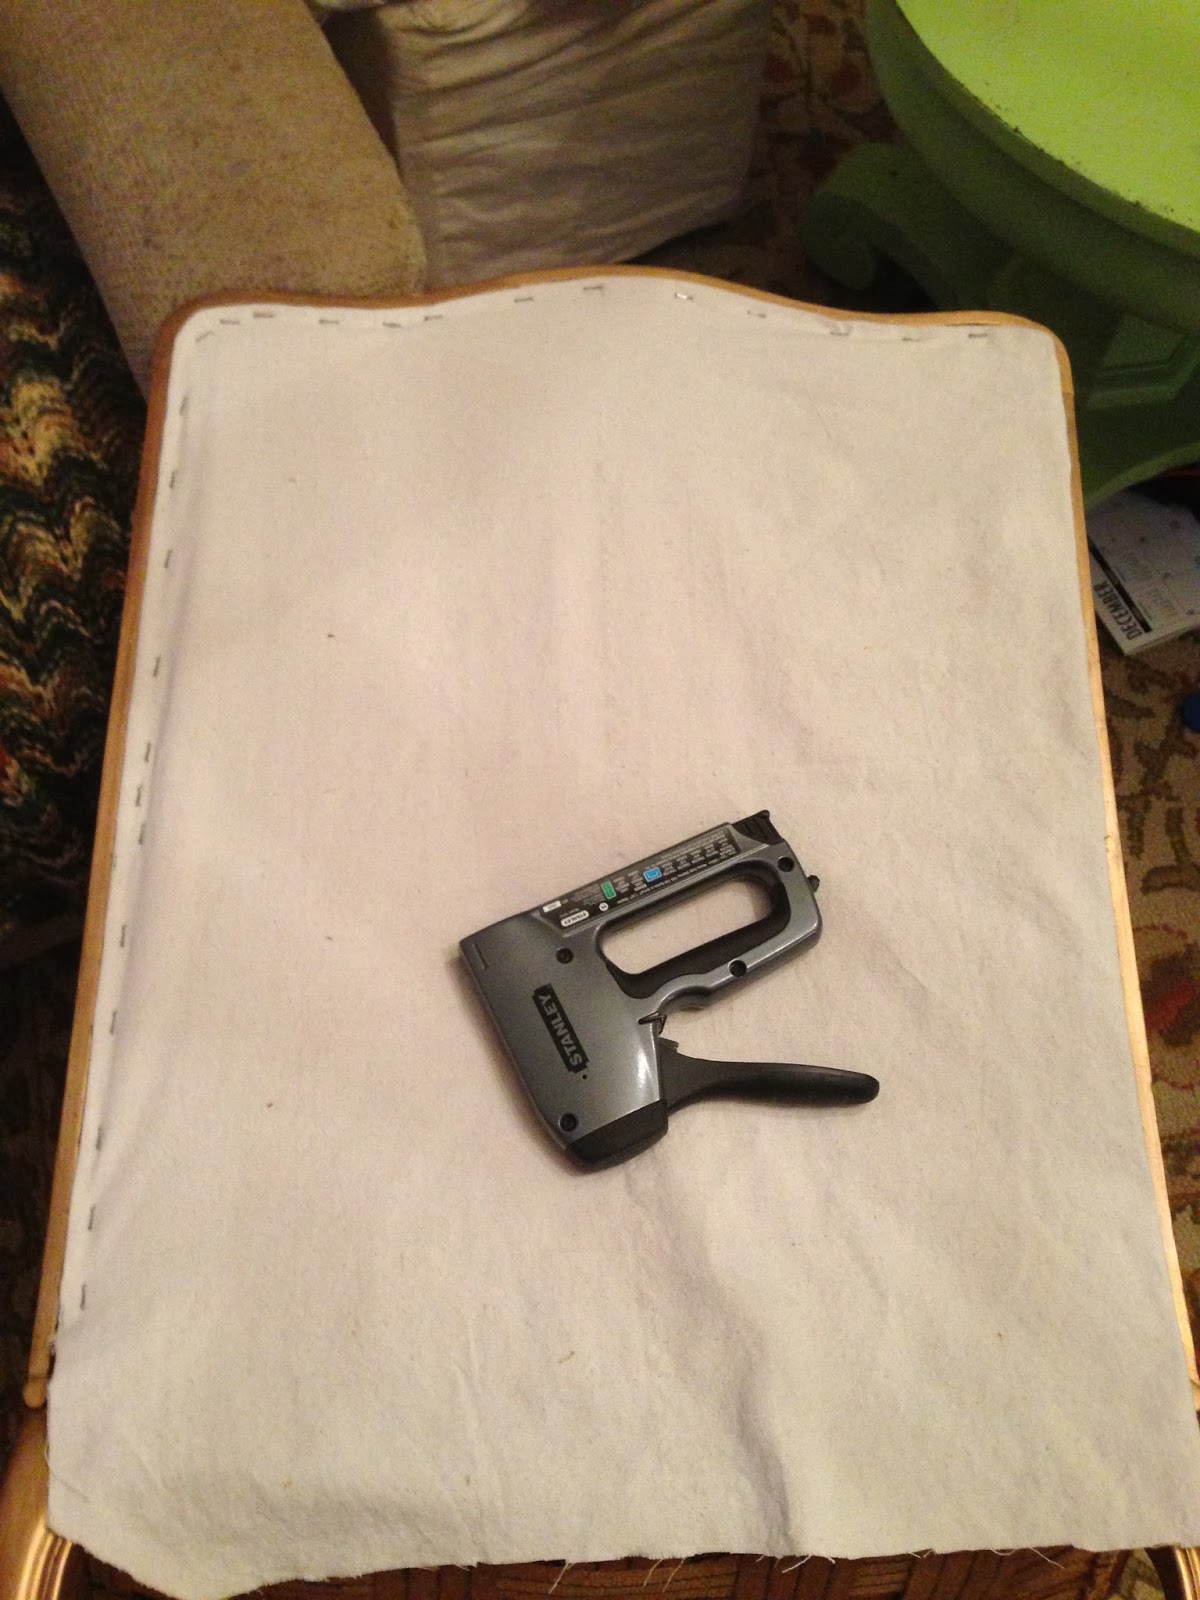

I ran out of staples....ugh.  I can still remove the tacks and cut the fabric but the actual reupholstering part will have to wait. I am toying with the idea of using some trim to cover up the staples but using a roll of upholstery tacks should hide my stapling, and by roll not individual ones to be hammered in. 


      Here's a close up....hey not too shabby for my first time! More to come I promise.  But in the meantime, I did see a chair in the window of a consignment shop....


Tuesday, November 19, 2013

I've got the fever for decorating this Holiday Season...

I'm not running a real temperature. I do have my heat turned on today, and my favorite blanket over me.  

I tend to wait until Thanksgiving is over before I decorate for Christmas.  I'm in no rush to get through one holiday to get to the next.  It has become a tradition for us to put up our Christmas tree on the weekend after Thanksgiving. It's also a tradition for my children to make something special for each family member.  I try and find a cute but doable kids craft to celebrate the season, and to teach them that "giving" is more important than "getting".  I'm still searching for the perfect project that the 3 of them can work on together.  

Since the sun is shining today, I decided I needed to take advantage of this outdoor weather and get in some spray painting.  I am very excited to show you all what I made.  I purchased this punch bowl at an auction for a quarter....that's right 25 cents.  It's a thick, heavy glass, loved the shape, and the embossed fruit on it.  Now I knew I was never going to use it for it's intended purpose, it just didn't have a purpose when I first bought it, but leave it to me to figure something out.  I have been dying to use a product by Krylon called "looking glass".  It makes any glass look like it could be old mercury glass.  I'm still looking for actual mercury glass but I know it will be more than a quarter.  


Here's what it looks like after 3 coats.  I could have been done in 2 but felt that maybe giving it another quick coat would get all the spots I might have missed.  If you are looking for that "mottled" look then you will want to take a little water and spray that first, and then apply your Krylon spray.  


Once you use this, it is NOT recommended that you place food, beverages or plants in it.  However, I decided to wing it with a small pine tree that I left in it's original container.  I placed some small glass rocks on the bottom.  I had these left over from my daughter's "fairytopia".


 I planted a small pine tree that I picked up at Lowe's for $8.99.  After Christmas, I'm going to look for a small fake one to use every year.

This tree is receiving the feline sign of approval.  That's our "Dolce", one of the sweetest cats in the world.  


I should mention that I added some mulch to keep the tree in place and to make it look nice. I have a huge pile of it sitting in my drive way. 


And this is the first of many Holiday decorations to be put up.  Let me know what projects you plan on doing this Holiday Season?   

Monday, November 18, 2013

For the love of milk..

   Collections can be big or small

      Oh how I love milk glass, really I love anything that is cherished and collected over time.  Other than having a small collection of milk glass, ironstone and a few pressboard paintings, I can't say that I really "collect".  I try and be mindful of the space that I have, which in this old house is limited.  Now if I should ever win the lottery and have a huge house, well look out, here I come!  I would most likely be featured on hoarders, but I'd like to think tastefully decorated.  In the meantime, I will just live vicariously through these beautifully arranged collections.  Leave a comment below and let me know what you would collect, if you won the lottery?


I am completely smitten with this DIY project and now I am justified in buying more of these, just for this same project.  You can find more here: http://ruffledblog.com/diy-moss-and-milkglass-centerpieces/


I'm jealous of this plate collection.  I often look in the thrift store for plates just like these but sadly I've only managed to come across 1.  It is the star of my dining room.  You can find more here: http://twosugarbabies.blogspot.com/2012/03/inspiration-milk-glass.html


I love the different shapes and sizes of this small collection.  Milk glass really lends itself in so many ways, from vintage looks to contemporary.  It's all in how you display them.  You can find more here: http://rachaelherbert.blogspot.com/2008/06/milk-glass-vases.html


     These are a few of my press board oil paintings that I have collected.  They are reasonably inexpensive (goes along with my cheap tendencies), but what I really love about them is that someone, somewhere was inspired to paint these.  I love to make up my own stories about each of them.  

You can find them on etsy, for less than $20, which I believe all of mine were.  They really give a home a unique and handcrafted look.  You won't walk into another person's house with the same artwork hanging up or in my case leaning on my bookshelves.  

This one by far is my favorite.  It makes me smile every time I look at it.  I bought it when I decorated my middle daughter's bedroom in a shabby chic style.  My little girls are brunettes, but there is something that just reminds me of when my girls were this little.  She was so excited to become a big sister, but more so because she was getting a little sister of her own.  My son on the other hand really wanted, and still wants a brother.  He hasn't accepted the fact that this "Mama" is done.  

Creating a home takes time.  Sometimes you will love the results and other times your vision will be hard to re-create.  Don't give up.  Make it an extension of you and your family, and you will always love it.  The one thing I both love and hate is that I will never really be "done".  The needs of my family changes as well as falling in and out of love with furniture and home decor.  Don't take any of it to seriously and just have fun, live comfortably is what I always say.  Nothing in my home is too precious, trust me. I once took several pictures of furniture and walls in my home that were "crayon and in one case sharpie enhanced" by my creative 2 year old.  But it's our home to be creative, make mistakes in, and just enjoy being together as a family.


Sunday, November 17, 2013

Time to put your party hats on....

I just linked up to my first ever DIY Link Party over at DIY Showoff.  If you haven't checked out her blog post yet, you should!! I spent an hour over there today and plan to do more.  There are so  many beautiful and interesting entries.  Seriously, these gals are talented.

Here's the link: http://diyshowoff.com/category/other/that-diy-party/


Saturday, November 16, 2013

Did you really just buy that?

     It's been a week already, what?  Time flies when you are having fun shopping, transforming, decorating and blogging.  This is something I've wanted to do for some time now, but kept putting it off because of well, fear.  Yep, that's right! Things like, "Will I be any good at this?" or "What will people think?", kept popping into my head.  The biggest message that I have taken away from almost every blogger out there is "just be yourself" and "you can do this". So here I am, and I'm glad that you have found yourself here as well. Do you have any dreams of your own?  Tell me about them.

     And off to Goodwill I went......

     I managed to sneak away for a few hours this afternoon and shop to my heart's delight.  Of course I didn't walk away empty handed.  Now before I show you the pictures, I have to give you some fair warning.  Some of the things you will see are best described as "ugly" or even "really ugly".  Still want to have a peek?  I always try and look past finishes and surface dirt and think of new ways I can transform something.  Sometimes it works, and other times, not so much, but I'm always glad I've tried something different.  Without further ado.......


I'll give you a break down here.  These lamps will go in my son's room on top of his dresser.  I just need to find a couple of lampshades and maybe some ribbon to spruce up the shades.  His room is on a very long list of "to do".  I should mention they were a whopping $6 each.


I really love this painting.  The frame not so much in it's current state.  There are some minor dings on the painting,  but it adds to that shabby chicness that I love.  I already have in mind what the color of the frame is going to be.  I think it will help highlight the colors in the painting. I snagged this for $12.  You will just have to keep coming back to see the transformation. 

  
Now onto the "ugly" or "really ugly".  


She's a beauty isn't she?  I don't know why I've decided this tray is a she, but it works for me at the moment.  Bright red with lots of gold polka dots.  Clearly she was a craft that went wrong.  This is a really solid tray and I loved the square cutouts all along the sides.  A little bit of paint and she should be as good as new.  My investment in this was just $4 and I'm kind of embarrassed to show you all exactly how many cans of spray paint I own.  And as if her bling wasn't enough, you should see the next picture down below. 


Are you wishing you didn't look?  I know it's all a little "gold", but I have some ideas floating around in my head.  The wall shelves came as a pair for only $4 and the frame was $3.  I'm such a big spender, I know.

I had a little fun with instagram on the next few pictures.  I love silver, I just don't love to polish it.  Again I have some ideas floating around.


I have one more photo but I'm saving that for another day, another post.  It involves my love of milk glass.  Let me know all about some of your "ugly" or "really ugly" finds that you managed to transform.  


Friday, November 15, 2013

What's for dinner?

     I tend to choose recipes that are realistic for my family.  I look at things like cost, and how long something takes to prep.  I know there are lots of shortcuts in terms of finding already chopped vegetables, and I try and take advantage of what's on sale at the grocery store.  I guess you can sum up my cooking style as cheap and easy. Some other factors I take into consideration are the likes and dislikes of those that will be dining.  (Read this as my kids, ha). 

     So what's for dinner tonight?  Let's just say this meal had me at it's delicious picture I pinned off Pinterest.  

                           Brazilian Shrimp Soup 


                           Here's a list of ingredients
  • 2 tablespoons cooking oil
  • 1 onion
  • 1 green bell pepper
  • 3 cloves garlic
  • 3/4 cup long-grain rice
  • 1/4 teaspoon red-pepper flakes
  • 1 3/4 cups canned crushed tomatoes in thick puree
  • 5 cups of water
  • 1 cup canned unsweetened coconut milk
  • 1 1/2 pounds medium shrimp
  • 1/4 teaspoon fresh-ground black pepper
  • 1 tablespoon lemon juice1/2 cup fresh parsley or cilantro
Please follow the link here for this amazingly delicious soup!! http://www.foodandwine.com/recipes/brazilian-shrimp-soup


I usually double up and make a larger batch on all my dinners.  During the week sometime, we have a hodge podge of leftovers and that works for me on nights we are busy. 

                I love the smell of garlic, onion and pepper.  


                              Now doesn't this look yummy?

Leave me a comment below and let me know what's for dinner at your house tonight? Bon Appetit!

Thursday, November 14, 2013

Table scapes for Thanksgiving...

     Thanksgiving is in just a couple more weeks, and my mind is on tablescapes.  With 3 kids, I find it difficult to set a beautiful table and expect it to remain that way, but this year I am going to make the effort.  I said effort, but with all the cooking it just might be paper plates and plastic utensils.  I spent an hour today on Pinterest, just pining away at all the beautifully dressed tables.  I want to share a few with you.


I love all the interesting things found on this table, especially the gold flatware. 


I love the modern twist on a very traditional way of setting a table.  You can read more below by following the link.  


I spent a little bit of time this afternoon bringing nature indoors, as well as working on a diy mercury glass punch bowl. (More to come on that later).  I know the suspense is killing you, right? 


Here's a cozy little corner inside my home.  My dining room is a dual purpose room as I have no foyer.  This is my small entry area, that I decided to give a slight mini makeover.  Note the small wooden tray I purchased from the Goodwill.  

 I added a pumpkin left over from my Halloween decorations and found some pine cones to add to the tray.  The red throw blanket was from Ikea, which I got in the "as-is" section for $4.00.  It's such a warm blanket on a chilly day.  


I had some fun with instagram, can you tell?  


Please share with me how you dress up your holiday table by posting a comment below!