This blog is all about using thrifty finds and a little bit of elbow grease to make your home, the home of your dreams.
Showing posts with label diy. Show all posts
Tuesday, March 4, 2014
Thursday, February 6, 2014
Bi-fold closet door become french doors
In Bliss and Copely's (I usually just say the girls or B and C's) room, their closet door was an off the shelf, bi-fold. It came off the track constantly and so it was on the list of get rid of, until I ran across, this tutorial on Pinterest by 2 Little Superheroes. She managed to make me look at the closet door situation a little differently and give this idea a go. After all, I had nothing to lose and my alternative was going to be using a fabric curtain to hide their clothes.
I took lots of pictures of this process but unfortunately they were all uploaded a while ago to my now non resuscitate computer. Oh well, I can still show you the after and on 2 Little Superheroes you can see the process on how she accomplished it. This was the same guideline I followed.
This project took her only 2.5 hours including painting time. That was not my experience in doing this. I think this can be done in the course of a weekend, but it took me much longer as I did other things while working on this project. I still have to patch and paint the inside of the door.
Taking off all the tracks on both the top where the door opens and the pieces attached on the floor were fairly straightforward and easy. Once I removed them I patched the walls, let dry, sanded, and painted.
Now, my bi-fold door is the same as the bloggers, so I used exactly the same hinges, magnetic strips etc. as she did. I'm thankful she took photos as it was a huge help in matching them up. I did have to sand and I still have a little fine tuning to do if I want to be a perfectionist. In that I mean the molding that was already there on the bottom of the wall juts out a bit so I can either sand it to make the door open really wide or just leave it be. It opens plenty wide to put clothes away and take out.
I initially just re-painted it white but seeing the interior of the other door that vibrant pink, I knew it too, needed to be the same color. It took 2 coats of the hot pink and I'm very pleased with how it turned out. The interior will most likely just be white. The knobs I purchased from Anthropologie a long time ago, and were a pretty shade of yellow but the color of them needed to change in order to work with the overall color scheme. This took about 4 thin coats of spray paint. Now, I've heard many bloggers voice concerns about spraying door knobs and how long they will last. I decided to seal them with poly to preserve them. I will let you know if they seem to chip or the color wears.
I took lots of pictures of this process but unfortunately they were all uploaded a while ago to my now non resuscitate computer. Oh well, I can still show you the after and on 2 Little Superheroes you can see the process on how she accomplished it. This was the same guideline I followed.
This project took her only 2.5 hours including painting time. That was not my experience in doing this. I think this can be done in the course of a weekend, but it took me much longer as I did other things while working on this project. I still have to patch and paint the inside of the door.
Taking off all the tracks on both the top where the door opens and the pieces attached on the floor were fairly straightforward and easy. Once I removed them I patched the walls, let dry, sanded, and painted.
Now, my bi-fold door is the same as the bloggers, so I used exactly the same hinges, magnetic strips etc. as she did. I'm thankful she took photos as it was a huge help in matching them up. I did have to sand and I still have a little fine tuning to do if I want to be a perfectionist. In that I mean the molding that was already there on the bottom of the wall juts out a bit so I can either sand it to make the door open really wide or just leave it be. It opens plenty wide to put clothes away and take out.
I initially just re-painted it white but seeing the interior of the other door that vibrant pink, I knew it too, needed to be the same color. It took 2 coats of the hot pink and I'm very pleased with how it turned out. The interior will most likely just be white. The knobs I purchased from Anthropologie a long time ago, and were a pretty shade of yellow but the color of them needed to change in order to work with the overall color scheme. This took about 4 thin coats of spray paint. Now, I've heard many bloggers voice concerns about spraying door knobs and how long they will last. I decided to seal them with poly to preserve them. I will let you know if they seem to chip or the color wears.
Here is one door in the white and the other in pink.
I love these doors now, I also spray painted all the light switches in the same pink.
The doors open wide, this was just my shot of the interior.
All things considered, I would do this project again, but don't expect to have it done in 2.5 hours... :-)
Monday, January 27, 2014
Ikea footstools getting customized
Happy Monday everyone!! I hope you all had a great weekend. I know I sure did. My creative juices were flowing, and as such I managed to get a few projects started/finished, some on my list and others that suddenly inspired me to drop everything and do.
A few months ago, I bought 2 small footstools from Ikea. Super cheap at just $14.99 apiece. I picked out the off white canvas slipcover figuring I could just bleach away when needed. My initial plan for them was to flank them on each side of my bookcase, but when I got them set up, they came up, well kinda short, plus the off-white slipcovers didn't look right next to my very bright white bookcase. See my dilemma? I knew I would find a home for them eventually and recovering them would be a snap.
Here are a few pictures I found off Pinterest that really inspired me.
I headed to Jo-ann's and hit it big with 50% off all their fabric. I knew ahead of time that my 2 footstools would not be paired together, so I chose 2 separate fabrics. Both were on sale for $5.99 a yard and I bought 2 yards of each fabric. For $24 bucks, plus just a few extra dollars for a little bit of trim, I managed to customize these footstools to my own liking.
What I used to cover the footstools was my staple gun and my hot glue gun. You will also need a pair of fabric scissors to trim to size. If you didn't want to permanently attach your fabric you could easily substitute the glue for velcro strips. I used 2 yards for each with some fabric left over, (for future sofa pillows), and 2 yards of trim for each, with very little left over. You can omit the trim, but I chose to include it, as I just liked the look.
I started with the top of the footstool. I spread out my fabric and placed the top on it. I then just cut out a large square, giving me enough fabric to fold it on top and staple. Work on one side first with a staple and then pull the opposite side taut and again place a staple.
Fabric and trim for footstool 1.
Stapled underneath. I use a little bit of hot glue to keep the fabric down before stapling in place.
This is before I added the trim. You can leave it as is or add a decorative trim. I applied the trim using a hot glue gun.
Here's what the finished project looks like.
A few months ago, I bought 2 small footstools from Ikea. Super cheap at just $14.99 apiece. I picked out the off white canvas slipcover figuring I could just bleach away when needed. My initial plan for them was to flank them on each side of my bookcase, but when I got them set up, they came up, well kinda short, plus the off-white slipcovers didn't look right next to my very bright white bookcase. See my dilemma? I knew I would find a home for them eventually and recovering them would be a snap.
Here are a few pictures I found off Pinterest that really inspired me.
I headed to Jo-ann's and hit it big with 50% off all their fabric. I knew ahead of time that my 2 footstools would not be paired together, so I chose 2 separate fabrics. Both were on sale for $5.99 a yard and I bought 2 yards of each fabric. For $24 bucks, plus just a few extra dollars for a little bit of trim, I managed to customize these footstools to my own liking.
What I used to cover the footstools was my staple gun and my hot glue gun. You will also need a pair of fabric scissors to trim to size. If you didn't want to permanently attach your fabric you could easily substitute the glue for velcro strips. I used 2 yards for each with some fabric left over, (for future sofa pillows), and 2 yards of trim for each, with very little left over. You can omit the trim, but I chose to include it, as I just liked the look.
I started with the top of the footstool. I spread out my fabric and placed the top on it. I then just cut out a large square, giving me enough fabric to fold it on top and staple. Work on one side first with a staple and then pull the opposite side taut and again place a staple.
Here it is without the slipcover.
Fabric and trim for footstool 1.
Here's what the top looks like finished.
This is an interior wall inside the footstool. I hot glued the top and stapled. You can see at the bottom, the material was a little longer. I simply folded it over and gave it a bit of hot glue to make a seam.
This is before I added the trim. You can leave it as is or add a decorative trim. I applied the trim using a hot glue gun.
My next thing to do, is to just press it to get the wrinkles out and then spray some scotch guard to protect it.
Here is the second one I made using the same exact steps as the first. You will be seeing this same fabric again in a future post.
Thursday, January 16, 2014
Growing to-do list
I gave myself a nice day off yesterday. It was well deserved after the busy DIY-ing weekend. Now it's back to work, crossing off little projects as well as large ones along the way. I made what I thought would be a quick to-do list of what was still left to accomplish in the girl's shared bedroom, which easily turned into a much longer just off the top of my head list. Try 40 things listed in just under a minute. I'm sure I will find more, given some time. I'm not going to panic though. My goal is to create a room the girl's will not only love but will be able to grow with, not quickly race to the finish line, and possibly not love. But I'm still itching to get it completed in about 6 weeks. Remember, I have a whole house still to tackle.
My plan is to break down what's on my list and prioritize in terms of cost, time and overall design impact. I recently added an idea after seeing it on pinterest. I'm not sure if I'm going to tackle this project myself. I spoke to a local artist and showed her my plans, she gave me some really great tips but I accept what my skill set is. (I'm not convinced this is meant for me to do).
via Pinterest
Now imagine this above image, sans decorative molding, as well as not going to be located around a doorway. I have to deal with this odd wall and it's just begging for something. This just might be that something. I have to tell myself, it's just paint. If it doesn't look right, then I can paint right over it. This will tie in nicely with some DIY artwork I will be creating.
My plan is to break down what's on my list and prioritize in terms of cost, time and overall design impact. I recently added an idea after seeing it on pinterest. I'm not sure if I'm going to tackle this project myself. I spoke to a local artist and showed her my plans, she gave me some really great tips but I accept what my skill set is. (I'm not convinced this is meant for me to do).
via Pinterest
Now imagine this above image, sans decorative molding, as well as not going to be located around a doorway. I have to deal with this odd wall and it's just begging for something. This just might be that something. I have to tell myself, it's just paint. If it doesn't look right, then I can paint right over it. This will tie in nicely with some DIY artwork I will be creating.
My plan is to take a couple of these pagodas and place them on painted canvases. These will go on an eclectic art gallery wall I am trying to make for the girls. I want to have a mixture of inspirational words, abstract paintings, photographs as well as some of their own creations.
This is the exact giclee I recently purchased. Now just to frame it. I keep going back and forth over whether to use gold frames, white frames or a combination of both? Which would you choose?
I love how you can customize the size on this painting. This one is on my list, I just need to see how much wall space I will have.
I just got these in this week and I placed an order for pink and white baker's twine to hang them up. I bought 2 equal sets to go above each girl's bed. I chose the colors pink and turquoise.
Just to add a little bit of fun and whimsy, I just purchased this. It came in this week and I can't wait to get it up on the galley wall. This Etsy shop has a wide variety of faux deer heads to choose from.
I think in between each of my older kids having sleep over parties, I will try and cross off some of the smaller, less time consuming projects. The next thing on my list to purchase is a second bed to match my older daughter's bed.
I love this bed for the sleek design, and deep drawers. I think once I formulate a course of action, I should be good to go.
Tuesday, November 26, 2013
DIY Holiday Decor Inspiration..
Here come the holidays, ready or not.....
I've spent the morning with my 2 yr. old cuddling under the blanket and watching "Barney's Christmas" movie. It's cold today and yes I know it is November after all, but I am being a cold weather wimp. It's the kind of day where you curl up on the sofa, coffee in hand, and look for inspiration on Pinterest. You know what I mean? Oh and play a game of peek-a-boo.
For years I use to buy holiday decorations right after Christmas. My house looked and felt like a department store. Every square inch of my home had something to remind you of what time of year it was, just in case you forgot. What I cherished most then, and still do, are the hand-made ornaments my children have made throughout the years. They are always prominently displayed on our Christmas tree. Each of them delights in placing their own ornament and sometimes will secretly move the other's ornament out of the way to spot light their own. Kids, what are you going to do?
I've started to move away from the commercial aspects of the Holidays, and really reflect on what I want to give my children as warm, happy memories. I find myself gravitating towards a more hand-made, relaxing and use of natural elements in my home decor to bring out the true meaning of Christmas. An oasis of calm and peacefulness inside, where we can shut out briefly the hustle and bustle of everyday life.
This year I'm going to focus more on affordable, simple, DIY, holiday decorating that I can make. I've turned to Pinterest to find many inspiring projects, and I hope you as well find something to be inspired by.
Click here for the full tutorial.
What a cute and simple ornament to have my children make. They can even personalize it. Click here for the full tutorial.
Here's the how-to on this one.
1.You should be able to find these large styrofoam balls at any craft store.
2. I suggest spray painting these first in your desired color.
3. Use a spray adhesive, (Something you can find at your local craft store).
4. Sprinkle some glitter and then spray a sealant to keep the glitter on your DIY ornament.
Click here for more information.
Click here for the full tutorial.
I think I'm going to have a fun and festive weekend of DIY projects. Share with me any creative ideas you might have for the upcoming holiday season.
Wednesday, November 20, 2013
She's getting all BLINGED out...
Reupholstering for the first time.
I think I've mentioned before that I am a seat of my pants kind of decorator inside my home. Sometimes I manage to come up with some pretty amazing ideas, executed well, and other times, well I hide the evidence. I've read a few blogs from some very talented DIY ladies out there, on the topic of reupholstering. They make it seem fun and fairly easy to do. I want to join in on the fun and easy to do.
Okay, I'm about to admit something to you all, that I have NEVER said out loud. I am a "chairaholic". Yup, I see a chair and I can't say no, although I've gotten a lot better. In fact so good, I have managed throughout the years to clear out most of my chairs. I said most, but NOT all. Back when I worked full time and had a disposable income (has it been 10 years already?), I paid a whole lotta money for a pair of chairs that I had shipped from France. I was instantly in love with having authentic French furniture. The lines of the chairs are AMAZING, the orange and black tint to the wood, not so much, and the fabric...um don't even get me started on how ugly it is. But love is blind in many cases, and this has certainly been no exception. Let me introduce to you one of the pair. (The other one is camera shy, or is it she's hiding in the basement under a ton of stuff?) Now is the time to put on your rose colored glasses if you have any.
I wasn't lying when I said she was a little on the "orange" side and her frock, well again, don't even get me started. But I have a vision, or I've never taken off my own rose colored glasses. I needed to seriously do something to tone her down and make her more in line with my style and taste. (I'm still figuring out my style and taste). I grabbed a while back this thing called "Rub n' Buff", it was at Michael's and I was armed with a 40% off coupon. This tiny tube actually covers up to 20 square feet....impressive to say the least. You only have to use a minimal amount and by that I mean pea size for each section of the chair.
Here's what I used...a pair of disposable gloves, a somewhat stiff paint brush, and the Rub n' Buff. It's best to do this outside, although it doesn't have that, obnoxious of an odor. I simply squeezed a tiny amount on the tip of the brush and lightly painted it on, I then went over it with my finger. That really helps to smooth it out and distribute it a great deal more than the brush does. The brush was great for the smaller crevices and trust me there were plenty.
Here she is looking a little "fancy". Look at those legs...now can you see what I first fell for? I left the chair outside all afternoon. I have decided to do a section at a time, just in case at some point I feel that I am not able to reupholster the chair. The back of the chair being my starting point, since I have never done this before. It took a couple of hours of just pulling each individual upholstery tack out, using needle nose pliers. Ouch, is all I can say every time I pinched myself.
Being cheap and not wanting to invest in expensive fabric, I purchased a painter's drop cloth from Lowe's. It cost a whopping $20 bucks and should be enough to do the whole chair. I actually went with it because I love the look of the canvas. I did bleach it and washed it a few times to "soften" it up.
Once I had the back fabric off, I placed it on top of the drop cloth and gave myself an inch all around.
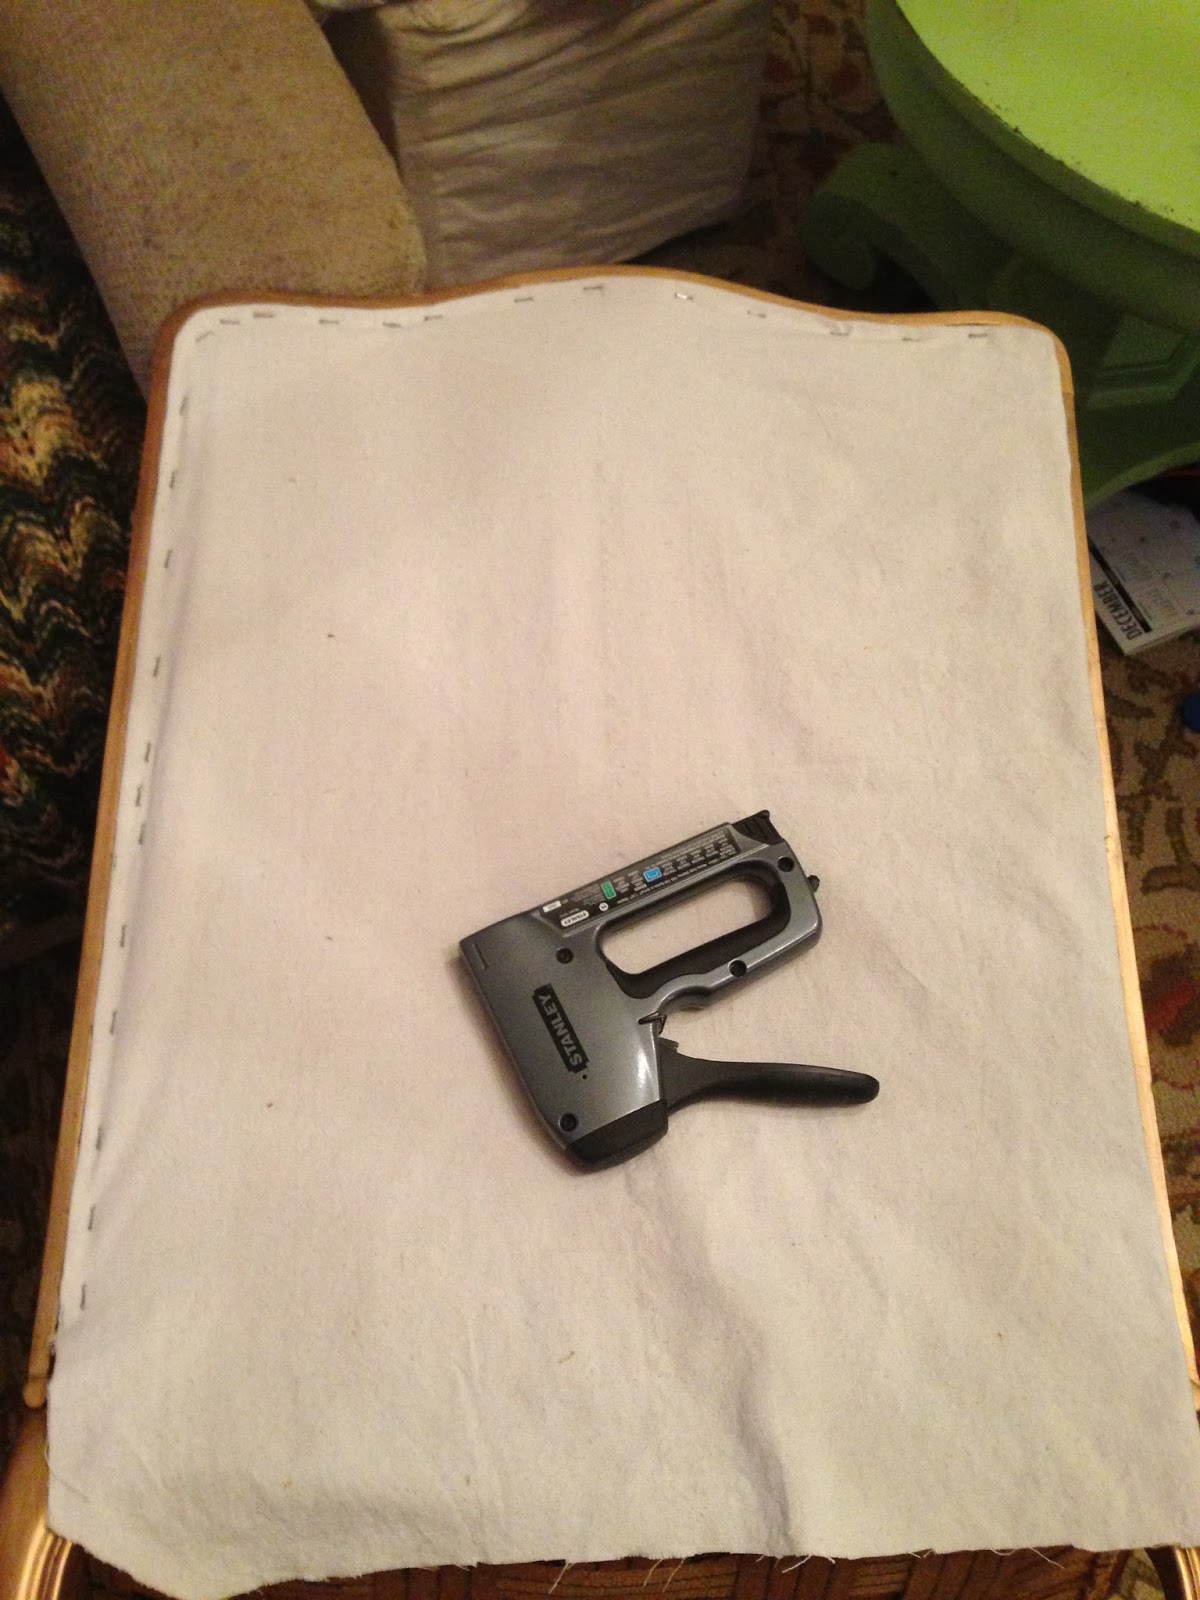
As you can see, I never work alone. Now onto the moment of truth. I already owned a staple gun. I just simply tucked the fabric slightly under and stapled. A few times I had to remove the staples because they weren't sitting flush, but all in all, it's pretty easy and (fun). I made sure to tighten and tug the fabric and almost managed to finish it all, when this happened.
I ran out of staples....ugh. I can still remove the tacks and cut the fabric but the actual reupholstering part will have to wait. I am toying with the idea of using some trim to cover up the staples but using a roll of upholstery tacks should hide my stapling, and by roll not individual ones to be hammered in.
Here's a close up....hey not too shabby for my first time! More to come I promise. But in the meantime, I did see a chair in the window of a consignment shop....
Labels:
chairs,
diy,
drop cloth,
french,
furniture,
gold,
reupholstering,
rub n buff
Sunday, November 17, 2013
Time to put your party hats on....
I just linked up to my first ever DIY Link Party over at DIY Showoff. If you haven't checked out her blog post yet, you should!! I spent an hour over there today and plan to do more. There are so many beautiful and interesting entries. Seriously, these gals are talented.
Here's the link: http://diyshowoff.com/category/other/that-diy-party/
Labels:
deer,
diy,
diyshowoff,
horses,
link party,
painting
Tuesday, November 12, 2013
Displaying jewelry
I knew I would end up using those 2 sweet milk glass compotes for holding jewelry. I already have a small collection that I found on Etsy, which I use to hold rings, and bracelets. I've needed something for a while to both organize and display my love of colorful beaded necklaces. I love seeing a little bit of pop against the white shelves, which just seems to energize the room. (And as I am no morning person, this helps).
I already owned these 3 above, which I purchased off of Etsy. I'll have a future post all about my DIY shelves and some of the projects I created on each of the shelves. And last but not least here is one more picture displaying how I used my $2 thrift store find to display my beaded necklaces.
What are some of the interesting ways that you display your jewelry?

I already owned these 3 above, which I purchased off of Etsy. I'll have a future post all about my DIY shelves and some of the projects I created on each of the shelves. And last but not least here is one more picture displaying how I used my $2 thrift store find to display my beaded necklaces.
What are some of the interesting ways that you display your jewelry?
Monday, November 11, 2013
What happens when horses meet deer?
No, the above title isn't a start to a really bad joke. Remember yesterday when I said I just might spray paint that gold frame? Well, I did but not in the white I had originally thought, in fact I went all out with Krylon's spray paint color "watermelon". Now, I am far from an expert on spray painting techniques, but I do love the quickness and convenience it has to offer. I'm more of a fly by the seat of my pants decorator.
Here's a re-cap of yesterday's gold frame and horse painting.
This one is called "Winter Wind" and retails for $3.75, with shipping it becomes a little bit pricey but for a unique idea on art work it's really not bad.
I started by covering the actual painting with newspaper.
Here's a re-cap of yesterday's gold frame and horse painting.
I really needed a large frame for, well wrapping paper. I found through Pinterest this great site called Elum, you can find the link here http://www.elumdesigns.com/shop/paper-gifts/eco-friendly-gift-wrap/
The paper I fell in love with is this one down below.
I started by covering the actual painting with newspaper.
Grabbed one of these, I ended up using almost an entire can of spray paint. This frame required about 4 coats, and I gave about an hour in between each coat.
The gift wrap comes as a large sheet size 22x34, so I needed to cut it down to fit inside the frame. Here is a picture of my sophisticated tools.
My tools consisted of a ruler missing a corner, a tape measure, a very shiny pencil, I couldn't find my exacto knife so a paring knife stepped in, and then of course a pizza box to do the actual cutting on. I simply measured the inside of the frame and then turned over the gift wrap to make my measuring marks.
Next up I used a spray adhesive as well as a matte finishing spray to tone down the pink and add an extra layer of protection on the gift wrap.
And this is what I ended up with.
The adhesive came through a bit on the bottom, but I am keeping my fingers crossed that it will dry clear, but either way I still love it!!
More to come down the road, as I fully transform my girl's room from top to bottom.
Subscribe to:
Posts (Atom)